THE CLARINET REED
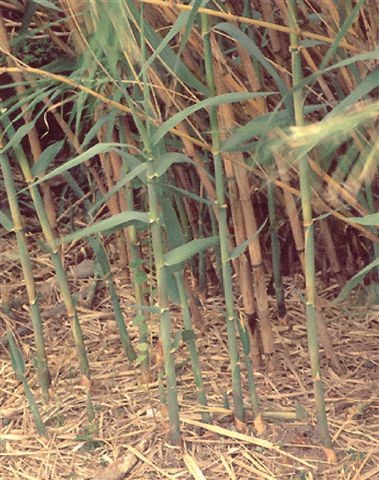
SOURCE - ARUNDO DONAX. . .
 |
Arundo donax is the botanical name for the species of cane from which reeds for woodwinds instruments are made. This type of cane grows in abundance in southern France which has some of the best soil and climatic conditions for good production. The cane which grows to an average height of fifteen feet, is cut during February and March after two years' growth. It is stacked in fields like wheat and left for three or four months, after which it is cut into joint lengths. The first selection of tubes are dried once again for two months after which they are sent to the factory for finishing. At this time the warped tubes are "weeded-out" and discarded, and only cane having a golden yellow-brown bark is selected.
WHY FIX REEDS?
In comparison to oboists - who for the best results - make their reeds, the problem for the clarinetist is a simpler matter, he can buy them by the box. He does this knowing that from a full box of reeds, only a fraction will pass the "usable" test, and from those, only two to three will perform with satisfactory results. Making reeds by hand affords the player much valuable knowledge, a lot of expended time, and results that are not consistent and satisfactory. Most players focus their knowledge of reeds to the "adjusting" technique, and spend necessary amounts of time in preparing, adjusting and breaking-in clarinet reeds. Few good reeds can be played 'right out of the box' but many young players do just that - pick one, put it on the mouthpiece and play it until it becomes waterlogged, soggy and just won't play any longer.
However, there is a better solution, and this solution is predicated on the teacher showing the student how to make critical adjustments on reeds at the clarinet lesson. The very young student won't be able to digest much - if any - of this information, but the the intermediate and advanced student certainly will gain valuable skills from a "hands on" approach to reed fixing.
BRAND X OR WHATEVER
Consistency of reed maker is very important to young students. The meaning of the strength number varies from brand to brand. A 31/2 "Grand Concert" reed made by Rico might feel much softer than a 3/12 made by Vandoren. If the student is allowed to "flit" from one make of reed to another, he will very likely have more than his share of embouchure trouble. One of the advantages of machine-made reeds is in fact that, in spite of any variation in cane, in seasoning, in proportion and symmetry of the blanks, the vamps of all reeds of the same brand and strength are quite uniform.
Even with complete consistency of brand and strength, reeds still vary so greatly that only by actual careful selection can real uniformity from reed to reed be achieved. Only when uniform excellence of reeds is achieved, so that the student is constantly steering in the same direction, will his tone improve steadily and surely. If he is allowed to play just any reed, this will not happen; he will get nowhere with his tone.
In addition to lack of uniformity, there is also the real danger that the student, left to himself, will play softer and softer reeds, mistaking ease of blowing for excellence of tone. If the student is to have the correct reed, either he or the teacher must own a sufficient number of reeds to make such a choice possible. The common practice of purchasing one reed at a time and playing it, good or bad, will never insure a consistent practice of playing the right reed. Hopefully there will come a time when the student is sufficiently advanced to select his own reeds intelligently, but this time must not be hurried. Even with advanced students, any suggested change in style of tone must be implemented by changing the style of reed and/or mouthpiece, and here again the teacher must step in and test all the newly suggested equipment himself. If he does not do this, he is not, in any manner of consistency, being a good teacher.
TO TOOT OR NOT TO TOOT!
In spite of the great importance of reed and mouthpiece to clarinet playing, there are many students who have never had their reed tested by the teacher. The concept of the teacher playing on the student's instrument carries the stigma of "germs" or unsanitary procedure. This problem must be solved either by means of alcohol, a chemical disinfectant, soap and and water, or by mutual agreement between the teacher and student that it doesn't matter. I have tried students' reeds during all of my teaching career, and never have experienced any trouble of this kind; nor, to my knowledge have ever contracted or passed on an infectious disease. In my studio, there is one rule of thumb that is followed by all. If teacher or student is not well i.e. with a communicable ailment, we don't play on each other's mouthpieces. There is no way of avoiding the necessity for testing the strength and balance of a student's reed than by playing it on the student's mouthpiece and preferably on his/her clarinet. Good tonal results depend on the playing condition of the clarinet reed, and a young player - lacking experience and reed "savvy" - can not be expected to make the proper and positive adjustments to a clarinet reed.
PRELIMINARIES
A reed must be broken in over a period of days if it is eventually to become one that is dependable and usable for a period of time. Reeds that are "played-out" - that is used constantly without a rest period when they are new - most likely not will not be those whose performance and reliability will be remembered for a long time. A few necessary tools are important for good reed adjustment.
1. A very flat surface on which to place the reed for adjustment. Black marble, or tile is perfect. Black because one will be able to see clearly the particles left after scraping. Do not use WINDOW GLASS. It is thin, might break, and can be dangerous.
2. A reed trimmer. When you buy one, bring a reed to the store and cut it. Be sure no "burrs" are on the reed. If the reed is "burred," then the cutting edge of the trimmer is faulty, ask for another.
3. A supply of good quality of "Dutch Rush" (Equisetum hyemale) is a necessary tool for optimum reed fixing. If you purchase Equisetum from a music store it will be worthless. DON'T BUY IT. For additional information go to the above link.
4. A fingernail emery board.
5. Wet/Dry sand paper #600 grit.
6. A lot of patience and practice.
THE NITTY AND THE GRITTY. . .
Reed "fixing" or "adjustment" is a very necessary part of playing the clarinet. To have the perfect reed is a quest we all pursue, we don't find it, but we usually end this journey playing on a reed that does all we require of it for the particular momentary needs. For Respighi's Pines of Rome, a reed which will allow a beautiful legato into all registers of the instrument is a must.
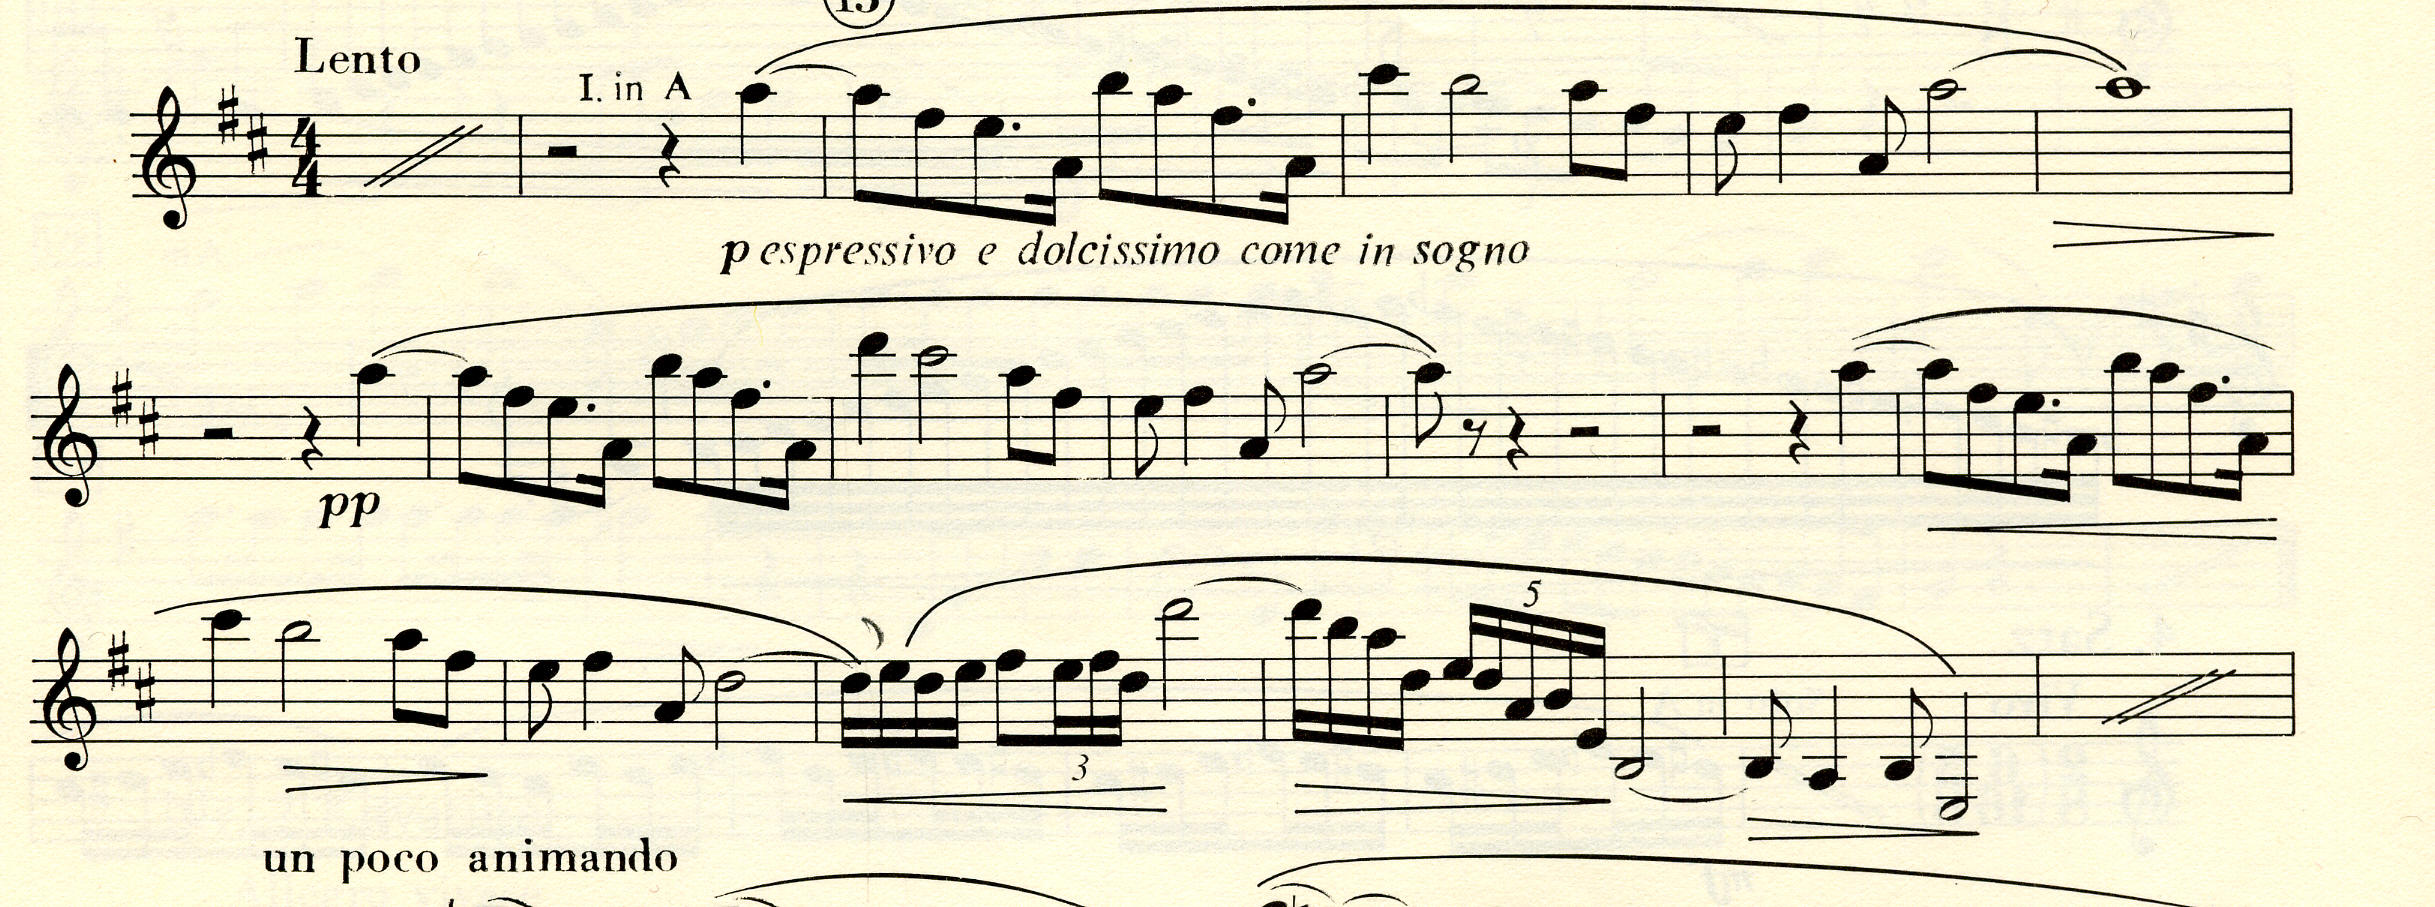
Resphighi - Pines of Rome
Mendelssohn's Scherzo requires one of which will produce a light and fast tongued articulation, totally different articulation from Richard Strauss's Ein Heldenleben; Wagner's Tristan und Isolde requires a more hefty piece of cane, and it goes on an on. If we had many of the above compositions on the same program would we change reed for each piece - I don't think so, but in theory, it sounds almost right. We have to prepare a reed which will do all of what the music requires, respond in such a way that is not tiring and have the stamina to hold up beyond "one act." Tough requirements? Perhaps, but we all manage to come through with reasonable success despite the moaning and groaning about reed problems.
WHAT TO DO AND WHEN TO DO IT
"What strength reed should I play?" is a question frequently asked by many young students, and my answer immediately centers on the mouthpiece and its facing. The strength of the reed is directly dependent on the length and curve of the facing, as well as the tip opening. A close facing will require stronger reed, and an open facing requires a softer reed. Extremes in either direction will pose many unwanted problems for young players, since a close facing is harder to match reeds to, and an open facing places greater strain on the player's embouchure in an effort to control the vibrating reed. When playing on a mouthpiece with a medium length and tip opening, students will have greater success in selecting good reeds.
This writer has found the following hints to be those which he has used effectively in selecting and adjusting clarinet reeds. Place the reeds on the black glassy surface flat side down. "Eyeball" the color of the cane - it should be a yellowish or golden color with as few striated brown streaks as possible. Reeds with the stock mottled with brown and gray streaks are the result of poor seasoning and are not likely to play well or deserve much attention. The following suggestions in selecting a good reed are:
1. Choose reeds with a yellow-golden color to the cane. This coloration indicates that it has been properly cured and will retain playing characteristics longer.
2. A smooth texture on the surface of the reed which feels smooth to the touch. Close fibers which feel smooth and hard to the touch resist "soaking up" and will remain resilient.
3. A bell-shaped heart which stands out clearly when the reed is held up to the light. The heart of the reed is the final determining factor with regard to tone quality and freedom of response. Lack of sufficient wood in the center of the reed causes it to "choke" when the player tries to play at a loud dynamic level, and the tone quality produced will seem thin and pinched.
Pick out three or four reeds you believe will be worthy of your efforts, and blow each one separately on your mouthpiece. Don't wet the reed, but place it on your mouthpiece and hold it only with the pressure of your thumb. Without beginning the tone with the tongue, blow into the mouthpiece (blowing on a dry reed using the tongue could split the cane). You are listening for a quality of sound that is as clear and focused as possible - not choked or stuffy; and you are making a determination as its strength. NOTE: This is the hardest call of all - TO DETERMINE WHETHER THE REED IS HARD/STIFF OR OUT OF BALANCE - because in this case, a correct diagnosis is necessary in to make the correct adjustments.
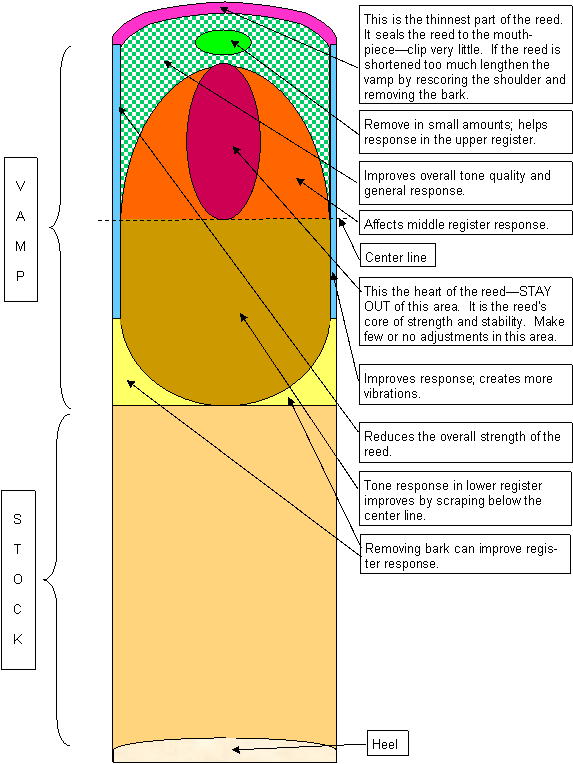
The comments that follow are associated with the number and color in the reed chart above.
1. When playing on a new reed, it would be wise to try it in different positions on the mouthpiece. Many times it will play better when slightly off center at the tip because they are seldom equally heavy on both sides. By moving its position, it is possible to favor the softer side and thus frequently improve response and tone quality.
2. Reeds which are out of balance must be adjusted with "Dutch Rush" - and other methods - for them to perform well on the mouthpiece. One side or the other may be thicker and should be scraped with 'rush' for balance. The general shape of the reed must be preserved at all times even though the scraping process diminishes the thickness at the sides and tip. The most effective area scraped for response is Checkered Green. Regardless whether the reed is soft or strong, remember that the vibrating area - tip and sides must vibrate freely enough to produce a clear tone. It is a fallacy to assume that one simply cuts a reed to obtain more tone, when what is required is more vibration. The reed must vibrate evenly whether hard or soft.
3. Working on reeds that have more wood in the center/ heart afford more opportunities to adjust than choosing - on a regular basis - reeds that are much softer. Those with an extremely soft tip usually have to be cut a few times to gain strength, and thereby shorten the vamp. These reeds are apt to sound shrill and edgy. Select reeds having the same length as the mouthpiece window. NOTE: If your playing needs are met by using reeds that are soft in strength, it would out of necessity, require that you play a mouthpiece with a rather wide tip opening.
4. Orange and Dark Red provide the overall strength to the reed. If the reed must be cut/clipped, these areas must be kept correctly proportioned.
5. Reduction of overall strength of the reed and increasing vibrations can be acquired by scraping Yellow as well as Brown.
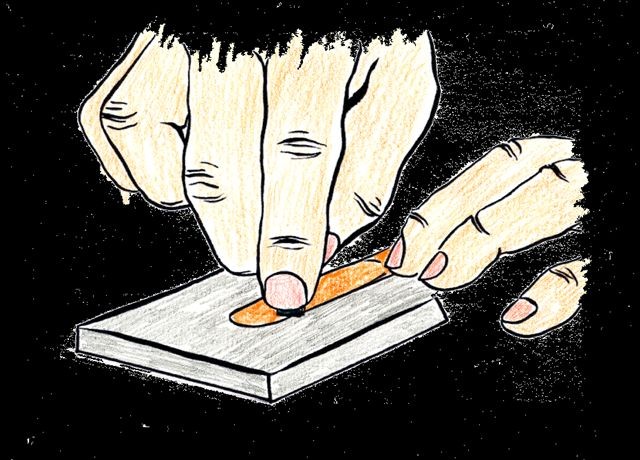
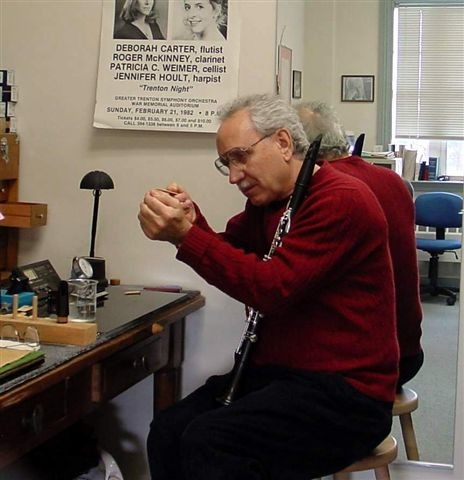
Scraping the reed with Equisetum ("Dutch Rush")
Checking the tip for resistance
6. During the winter months warped reeds continue to be a problem to clarinetists. The best reed in the world will not play well if it is warped and/or leaks on the mouthpiece. A most reliable test to determine a warped reed is as follows: 1) Close the end of the mouthpiece by placing it on the palm of the hand. 2) Draw the air out of the mouthpiece so that the reed closes against the rails creating a vacuum. 3) It should be at least a full second or longer until the reed pops back open. 4) A reed that is warped will pop back open very quickly, or will not close at all and no vacuum will be possible.
7. To prevent reeds from warping, I keep them in conditions that provide sufficient moisture. Ideally, 55 to 65% humidity creates enough moisture to stabilize and maintain adequate reed conditions. On the commercial market there are many reed holders whose construction provide very good conditions for storing reeds The Robert DiLutis reed case called The Reed Machine Reed Case holds 8 reeds with humidifying conditions, and is a first class storage system. One of the most widely used - and quite inexpensive - reed cases is the one which holds 4 reeds in a humidified atmosphere made by Vandoren.
Homemade kits can vary from a gasket-sealed lunch box with an added humidifier (from your local cigar store) and hygrometer, to a "Ziploc" sandwich bag with a small piece of moist sponge inside. If one likes the gourmet approach, orange peels inside the "Ziploc" are a tasty touch. In spite of all these assists and precautions against warping, REEDS WILL WARP and there isn't much we can do about it.
8. A reed's life expectancy depends on many factors some of which are:
a) The tension of the embouchure and style of articulation.
b) The amount and type of playing - chamber, orchestral or band.
c) The variation in the chemistry of the saliva. After I have used a reed for some time I dip it into Hydrogen Peroxide 3% solution for about 3 minutes for rejuvenation. It cleanses the reed from mold or mildew but it will tend to reverse the conditioning process by removing the accumulation of saliva build-up.
9. Keep records and make charts of reed adjustments. Reed measurements aren't perfect, but they provide a quick reference to the dimensions of a present or past reed that has played very well. Ben Armato, former clarinetist of the Metropolitan Opera has a excellent measuring device for reed adjustment called PerfectaReed.
10. If you find that you are changing to a new reed every two days or less, the consideration to "reed fixing" is a must, and even younger students should give it a try. Going to your clarinet lesson with a 'new reed' with the expectation that it will perform well is a myth - one which any good teacher will refute, and you will soon discover. Work at it often and experiment with the many steps required to alter its playing quality. Making any adjustment that enhances the reed's response to your style of playing is a step in the right direction. Have a plan - don't scrape away at the reed without knowing why you are scraping, where you are scraping and how much you want to remove from the reed. GO SLOWLY, CANE SCRAPINGS CAN'T BE REPLACED.