CLARINET EMBOUCHURE
The clarinet embouchure is one of the most widely misused and misunderstood aspects of clarinet playing. Over many years this writer has had an opportunity to work with young clarinetists, both beginning and advanced, and have observed a number of common faults. With careful understanding and applying a few basic adjustments, these players could begin to enjoy a well controlled clarinet tone. These faults - call them improper blowing methods - can never be corrected by simply practicing studies or long tones; the whole difficulty arises from the basic question of how one places the mouthpiece into his/her mouth. The following will be divided into Correct Procedures and Common Faults.
Correct Procedures
Develop good habits early. The errors in the formation of the embouchure tend to fall into a number of distinct categories which are extremely difficult to remedy after the student has formed certain habits in which the wrong muscular action is involved. On the other hand, if correct habits had been developed in the beginning, these students would find the development of tone production a relatively simple phase of their technique. At this point long tone studies designed for control and tone quality are indispensable. Practice the following:
1. Firm seal at the corners of the mouth.
2. The throat should have an open feeling. Form an AH sensation.
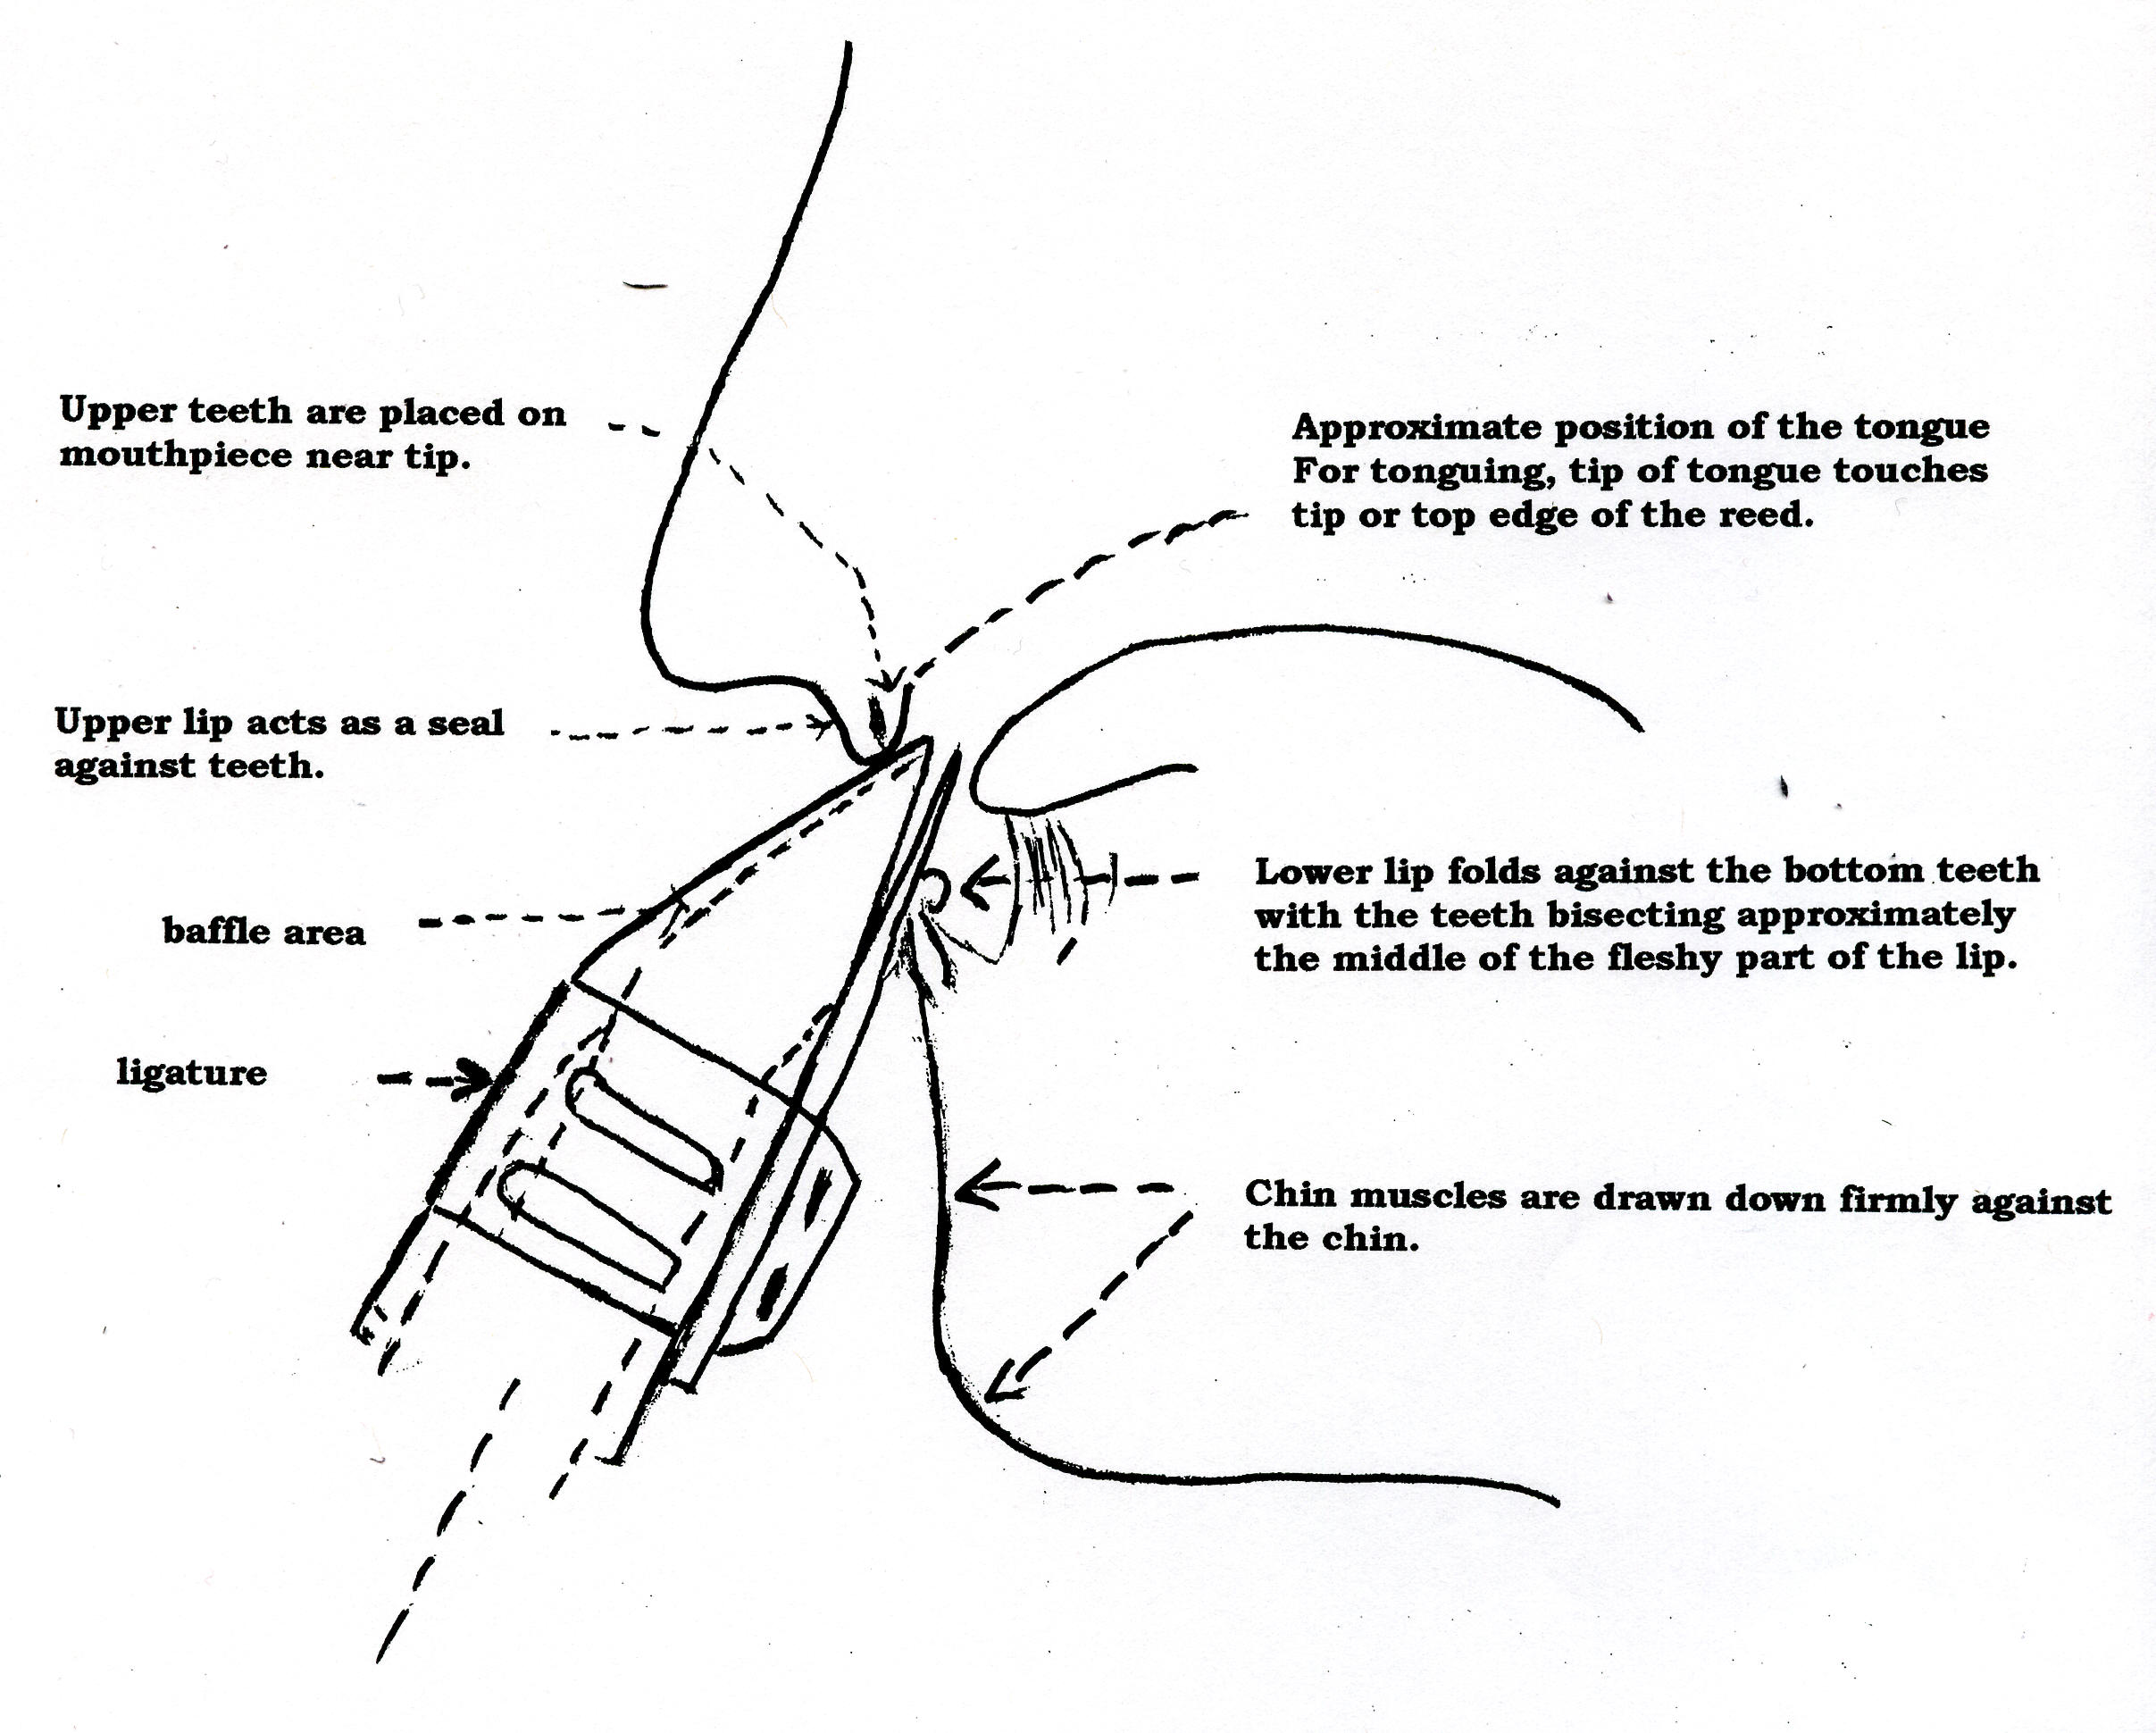
3. The angle of the clarinet depends mostly on the jaw formation but I believe a 35degree angle is quite effective. Figure 1 provides a good visual of the mouthpiece position.
4. With the help of the teacher as interpreter of anatomical jargon, Figure 2 illustrates the essential facial muscles that come into play in forming the embouchure.
a) Here one can see that the chin is flat and pointed downward - the labii inferioris muscle #3.
b) The muscular control around the mouthpiece is controlled by the lips - the obicularis oris muscle #1 is uniform and applied equally from all sides.
c) The corners of the mouth are drawn SLIGHTLY upward - the zygomaticus muscle #6.
d) Approximately one half of the red or fleshy part of the bottom lip is drawn over the lower teeth.
e) The cheeks are prevented from "puffing out." - the buccinator muscle #5.
5. Use a mirror. Careful visual monitoring of embouchure formation in addition to its actual formation is extremely helpful. The teacher can help by visually seeing the embouchure setting, and when the student is alone, standing/sitting in front of a long vertical mirror - if available - is an indispensable aid to correct habits.
Figure 1
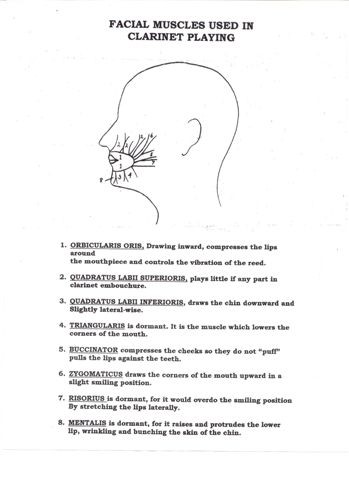
Figure 2
COMMON ERRORS ENCOUNTERED
1. Constricting and bunching the muscles in the chin and pushing upward to support the the mouthpiece.
2. Extreme pulling from the corners of the mouth causing a tight pinched tone. This concept is sometimes identified as the 'emphasized smile' position which is supposed to keep the chin flat. When overdone, sometimes a "hissing of air" is emitted comes form the corners of the mouth because the muscles cannot sustain the tension..
3. Rolling the lip not far enough or too far over the bottom teeth.
a) Rolling the lip too far causes the tone to sound dull, and in the upper register, unsupported and shrill.
b) Too little lip on the teeth - including a rolled wrinkled position - emits a very bright and edgy sound.
c) Both of these positions will eventually cause the lip to be sore and/or cut on the inside.
4. Puffing the cheeks.
5. Neglecting to place the top teeth on the mouthpiece.
6. Insufficient support from the right thumb in holding and supporting the instrument firmly against the top teeth.
7. Holding the instrument at too wide of an angle thereby causing the lower lip to rest too close to the tip of the reed causing a small "pinched" tone. Some of the above factors are evident in many young students and must be addressed. The fundamental principles seen in Figure 1.
SUMMARY
I have found that the lack of success encountered by a student in producing a good stable tone is directly related to the amount of mouthpiece that is placed in the mouth. Even though mouthpiece placement might seem to be correct, by instructing the student to move the lower jaw outward and downward on the reed, tone quality and control are greatly enhanced. This downward/outward placement with the jaw is by not means the prime factor in the successful production of tone, but merely moves the cushion of the lip further out on the reed allowing for more freedom of the reed to vibrate, thus eliminating the "thin" and "pinched" sound.
All of the above is predicated on constant support of the tone with proper breathing. Don't use greater lip pressure for the higher (altissimo register) notes more than the lower ones. Evenness of breath flow is absolutely essential for maintaining a well controlled tone. Changing dynamics is simply a matter of increasing or decreasing the amount of air that passes into the instrument. The support of that air should never change.